Many administrators of Windows terminal servers noticed that starting from Windows Server 2012, the management snap-ins tsadmin.msc (Remote Desktop Services Manager) and tsconfig.msc (Remote Desktop Session Host Configuration) are missing on RDS servers. MS developers have decided that the majority of RDS host settings could be managed using Server Manager, Group Policy Editor console (gpedit.msc), or through the RDS Collections settings. However, all these tools are not as easy and convenient as the old TS snap-ins.
Let’s see how to use legacy tsadmin.msc and tsconfig.msc snap-ins on RDS servers running Windows Server 2016 (this guide is also applicable for Windows Server 2019 and 2012 R2 environments).
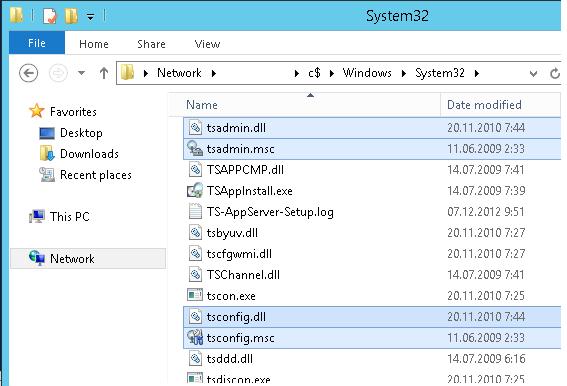
To do it, you have to copy 7 files and registry keys from any server running Windows Server 2008 R2 to the same directory C:\Windows\System32 on Windows Server 2016. Copy the following 7 files:
- c:\windows\system32\tsadmin.dll
- c:\windows\system32\tsconfig.dll
- c:\windows\system32\wts.dll
- c:\windows\system32\tsconfig.msc
- c:\windows\system32\tsadmin.msc
- c:\windows\system32\en\tsconfig.resources.dll
- c:\windows\system32\en\tsadmin.resources.dll
Then on Windows Server 2008 R2 by using regedit.exe you have to export two registry key to the *.reg files:
- [HKEY_LOCAL_MACHINE\SOFTWARE\Microsoft\MMC\SnapIns\FX:{80aaa290-abd9-9239-7a2d-cf4f67e42128}]
- [HKEY_LOCAL_MACHINE\SOFTWARE\Microsoft\MMC\SnapIns\FX:{3FCE72B6-A31B-43ac-ADDA-120E1E56EB0F}]
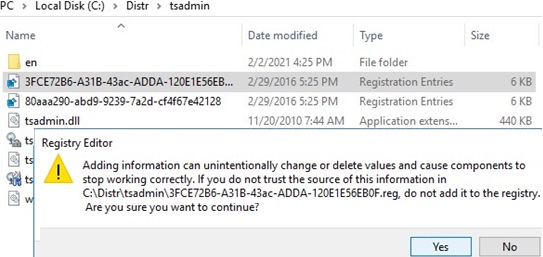
And in turn, import these reg files into the Windows Server 2016 registry. Just double-click on the reg file and agree to make changes to the registry.
It remains to copy the dll and msc files to the C:\Windows\System32 directory on the Windows Server 2016 host. It is not necessary to register the dll files using the REGSVR32.
- The set of files for the English version of Windows Server — tsadmin_msc_windows-server-all.zip
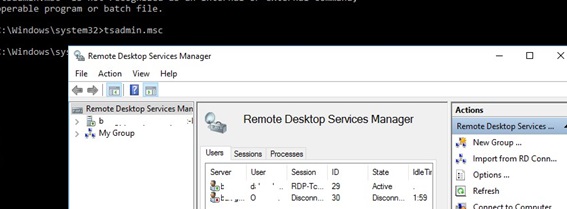
After that, try to starting the TSAdmin snap-in by running the command: tsadmin.msc
In this console you can conveniently manage user sessions – you can disconnect the session, send a message, initiate a correct logoff, etc. The tsadmin snap-in allows you to select multiple users at once and perform an action on all of them.
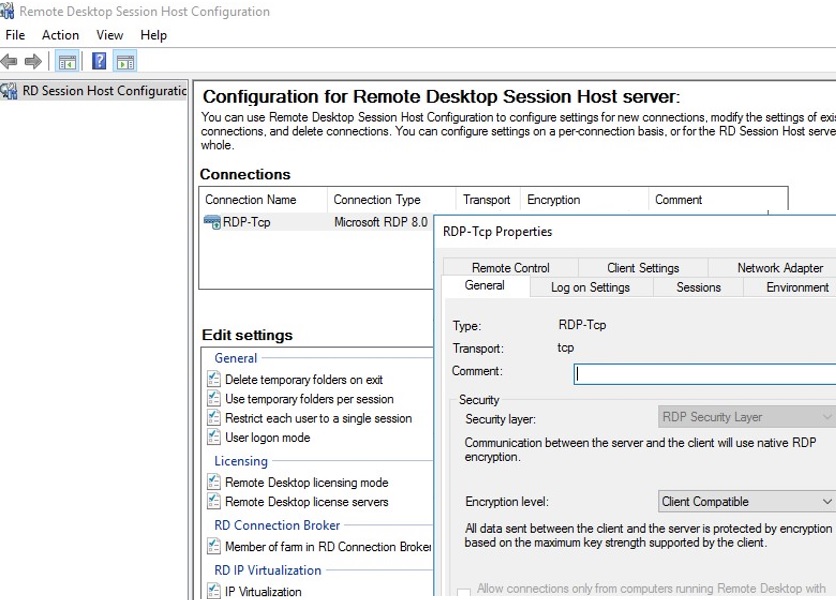
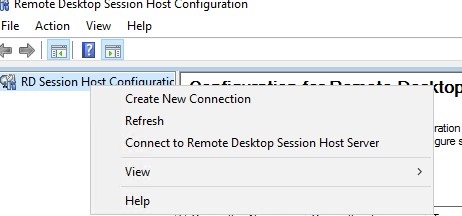
You can run the tsconfig.msc console.
In the tsconfig.msc console, it is much easier and more convenient to configure the basic parameters of the RDS host: set the licensing server and the type of RDS CAL, add the host to the RD Connection Broker farm (configure the host weight in the farm), set the RDP encryption levels, configure the program to start automatically when the user logs in into a session, configure timeouts for disconnected user sessions on a stand-alone RDS host, etc.
Note that it is not necessary to install these tsadmin consoles on all RDS hosts. You can use the “Connect to Remote Desktop Session Host Server” option to remotely manage other RDS hosts on your network.
It should be noted that using the tsadmin.msc console you won’t be able to connect to the user’s terminal session (error: Access is denied). It is possible to connect to user Remote Desktop session using the scenario described in the article RDS Shadowing on Windows Server.
In addition, there is no Security tab in the tsconfig.msc console in the RDP-Tcp connection properties. This tab was handy for granting permissions to the tech support team (non-admin group) to connect and manage user sessions on RDS host. I use the following command to give a specific group full control over the RDP sessions on the server:
wmic /namespace:\\root\CIMV2\TerminalServices PATH Win32_TSPermissionsSetting WHERE (TerminalName ="RDP-Tcp") CALL AddAccount "woshub\helpdeskteam",2
You can use PowerShell to view the current permissions on the RDP-tcp connection properties:
get-WmiObject -Namespace "root/cimv2/terminalservices" -Class win32_tspermissionssettin

6 comments
What about the security tab in the RDP-Tcp properties?
you’re awesome worked perfectly.
todo perfecto gracias
Thank You so much!!!!
Finally someone had a solution
Thank you very much!
The process worked correctly.
Congratulations for the post.
Too bad that “Security tab” is what I need to grant permission to send msg from nonadmin accounts 🙁